28 Feb 2024
4 Min Read
Up-to-date Data Pipelines for Rideshare App Driver Ratings
Markets like e-commerce, the gig economy, and local businesses all rely on ratings to give an accurate representation of how good a product or service is. Ratings are not only useful for consumers, but they’re also useful for the companies managing these goods and services. While the use of ratings don’t typically require low-latencies, there are still some cases where having an up-to-date rating can unlock opportunities. For example, in a rideshare app, a company may want to block a driver whose rating has fallen below a certain threshold from taking more trips. This is to prevent riders from taking rides from unsafe or unpleasant drivers. Without a rating that is up to date, the systems that validate if a driver is eligible to drive more passengers are working with outdated data and cannot accurately determine if a driver should be allowed to drive or not.
In this post, we’ll showcase how DeltaStream can be used to keep ratings up to date to solve this rideshare use case.
Connect a Store and Create a Stream
Let’s assume we have a Kafka cluster with a topic called “driver_ratings” which contains the data that we’ll be sourcing from, and we’ve already defined a DeltaStream Store for this Kafka cluster (see tutorial for how to create a Store in DeltaStream) called “kafka_cluster.” We can create a Stream to represent this data with the following statement in DeltaStream:
Real-Time Driver Ratings
For our use case, we want to keep an up-to-date rating for drivers, as well as an up-to-date count of how many reviews a driver has. These values will help downstream applications determine if a driver should be suspended. If a driver has a certain number of rides and their rating is below some threshold, then they should be suspended.
Notice in the schema of the data, from the Stream definition in the setup, that there is a driver_id and rating field. The driver_id field specifies which driver is being rated, and the rating field specifies the rating that the driver has received for a trip. To determine the driver’s rating, we need to keep an up-to-date average of all of a driver’s rides for each driver. We can do this in SQL by grouping by the driver_id field, then using the AVG function to calculate the average. Similarly, for finding the number of reviews, we can use the COUNT function. These results will be persisted to a materialized view so that data consumers can easily query the view to find the latest driver ratings.
CREATE MATERIALIZED VIEW AS SELECT Query:
Since the above query performs an aggregation grouping by the driver_id field, the result has a primary key of driver_id. This creates a materialized view in UPSERT mode, such that there is always one row per driver_id that reflects that driver’s current ratings.
By submitting the query, DeltaStream launches a long-lived continuous job in the background which constantly reads from the driver_ratings topic, computes the latest averages and counts, then updates the materialized view. This way, as new ratings arrive in the source topic, the materialized view is updated immediately.
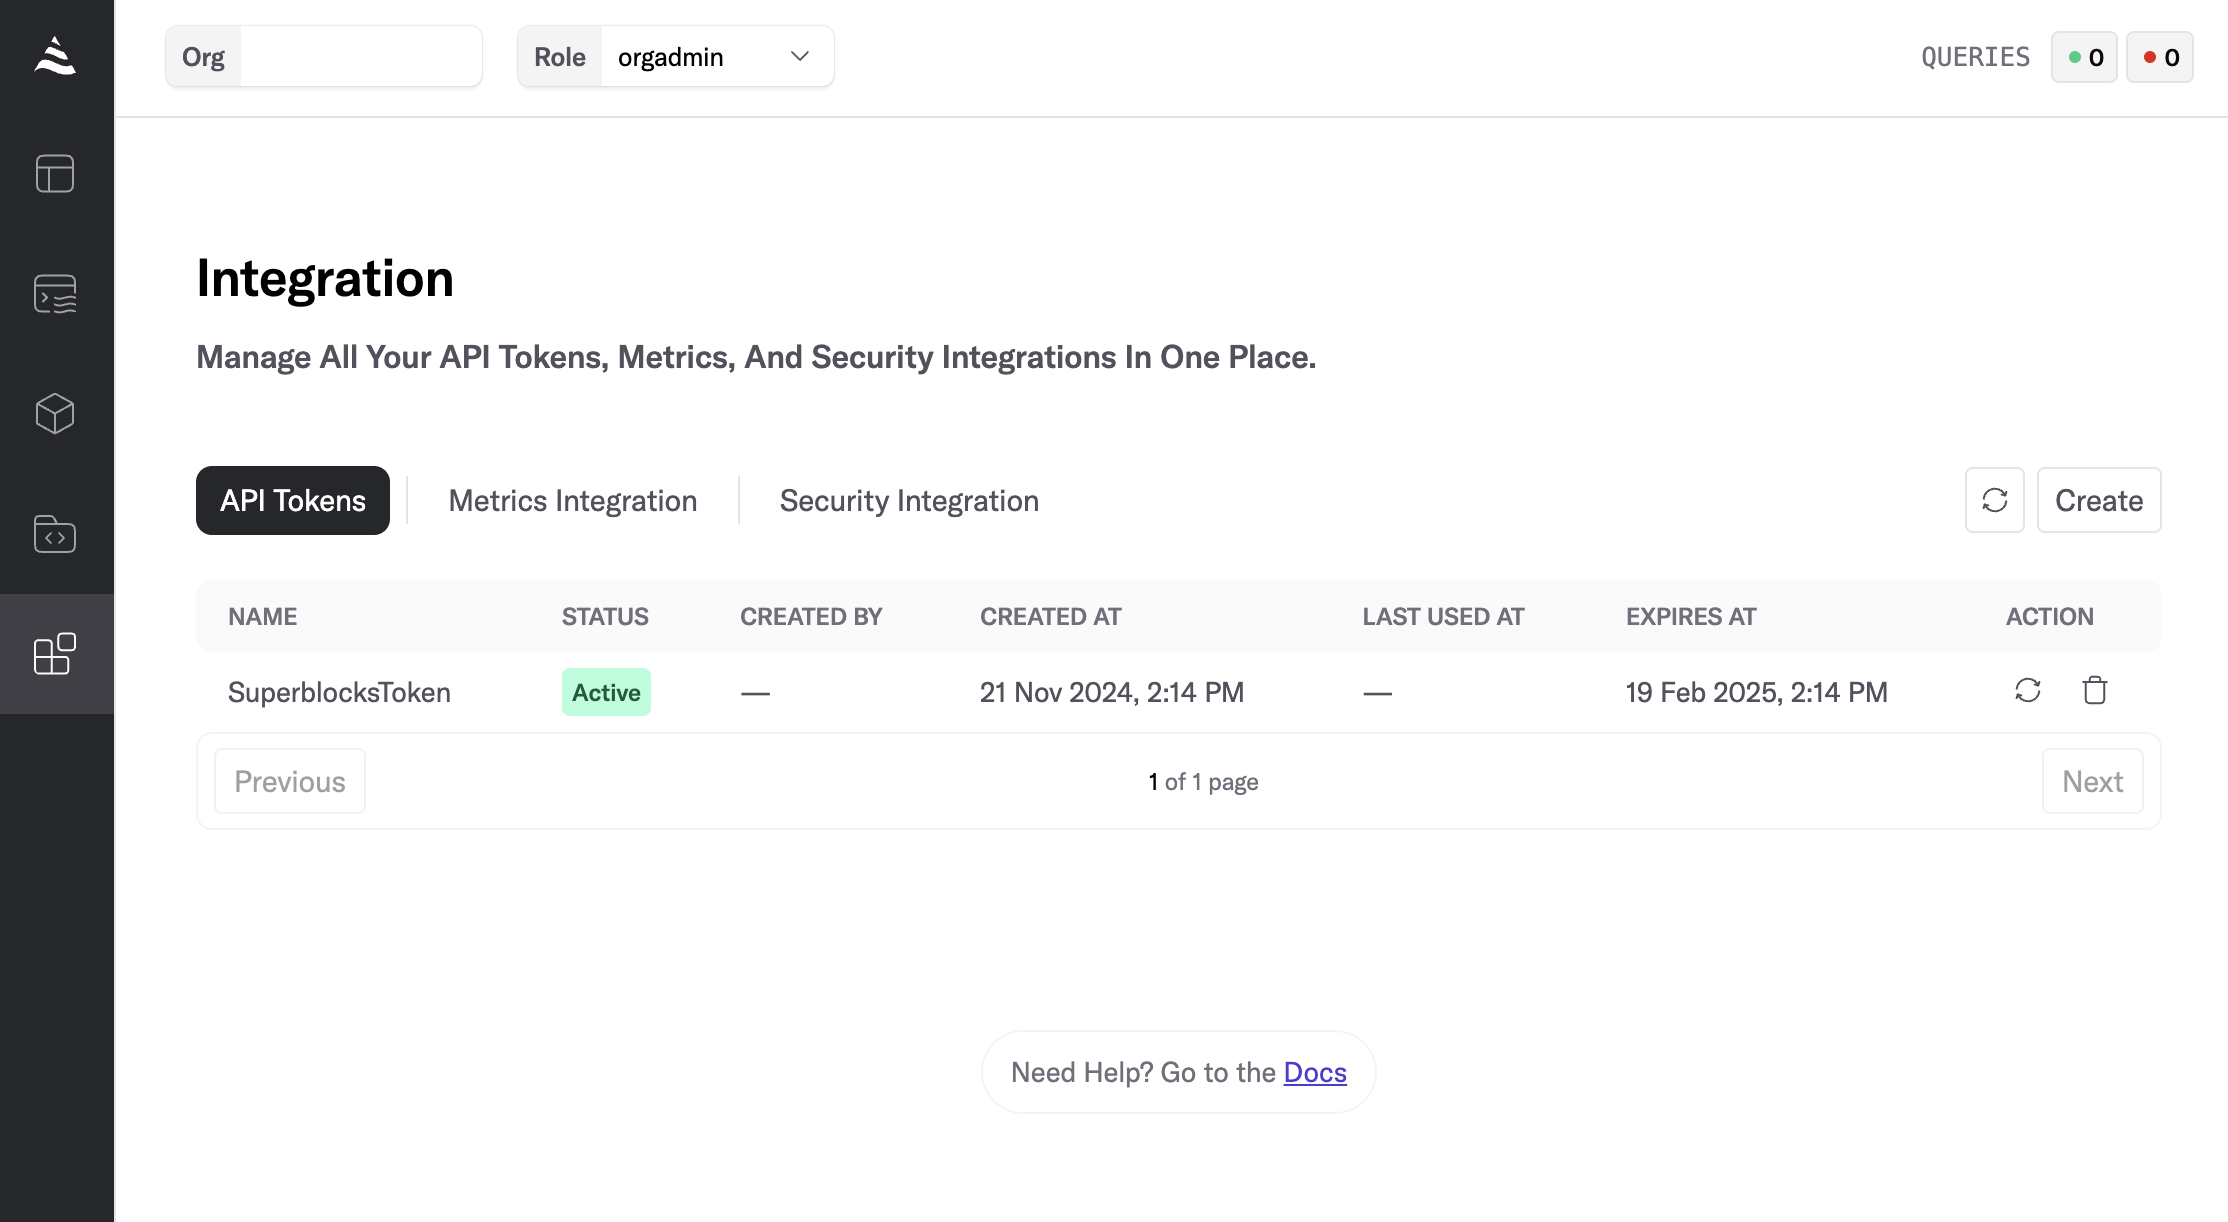
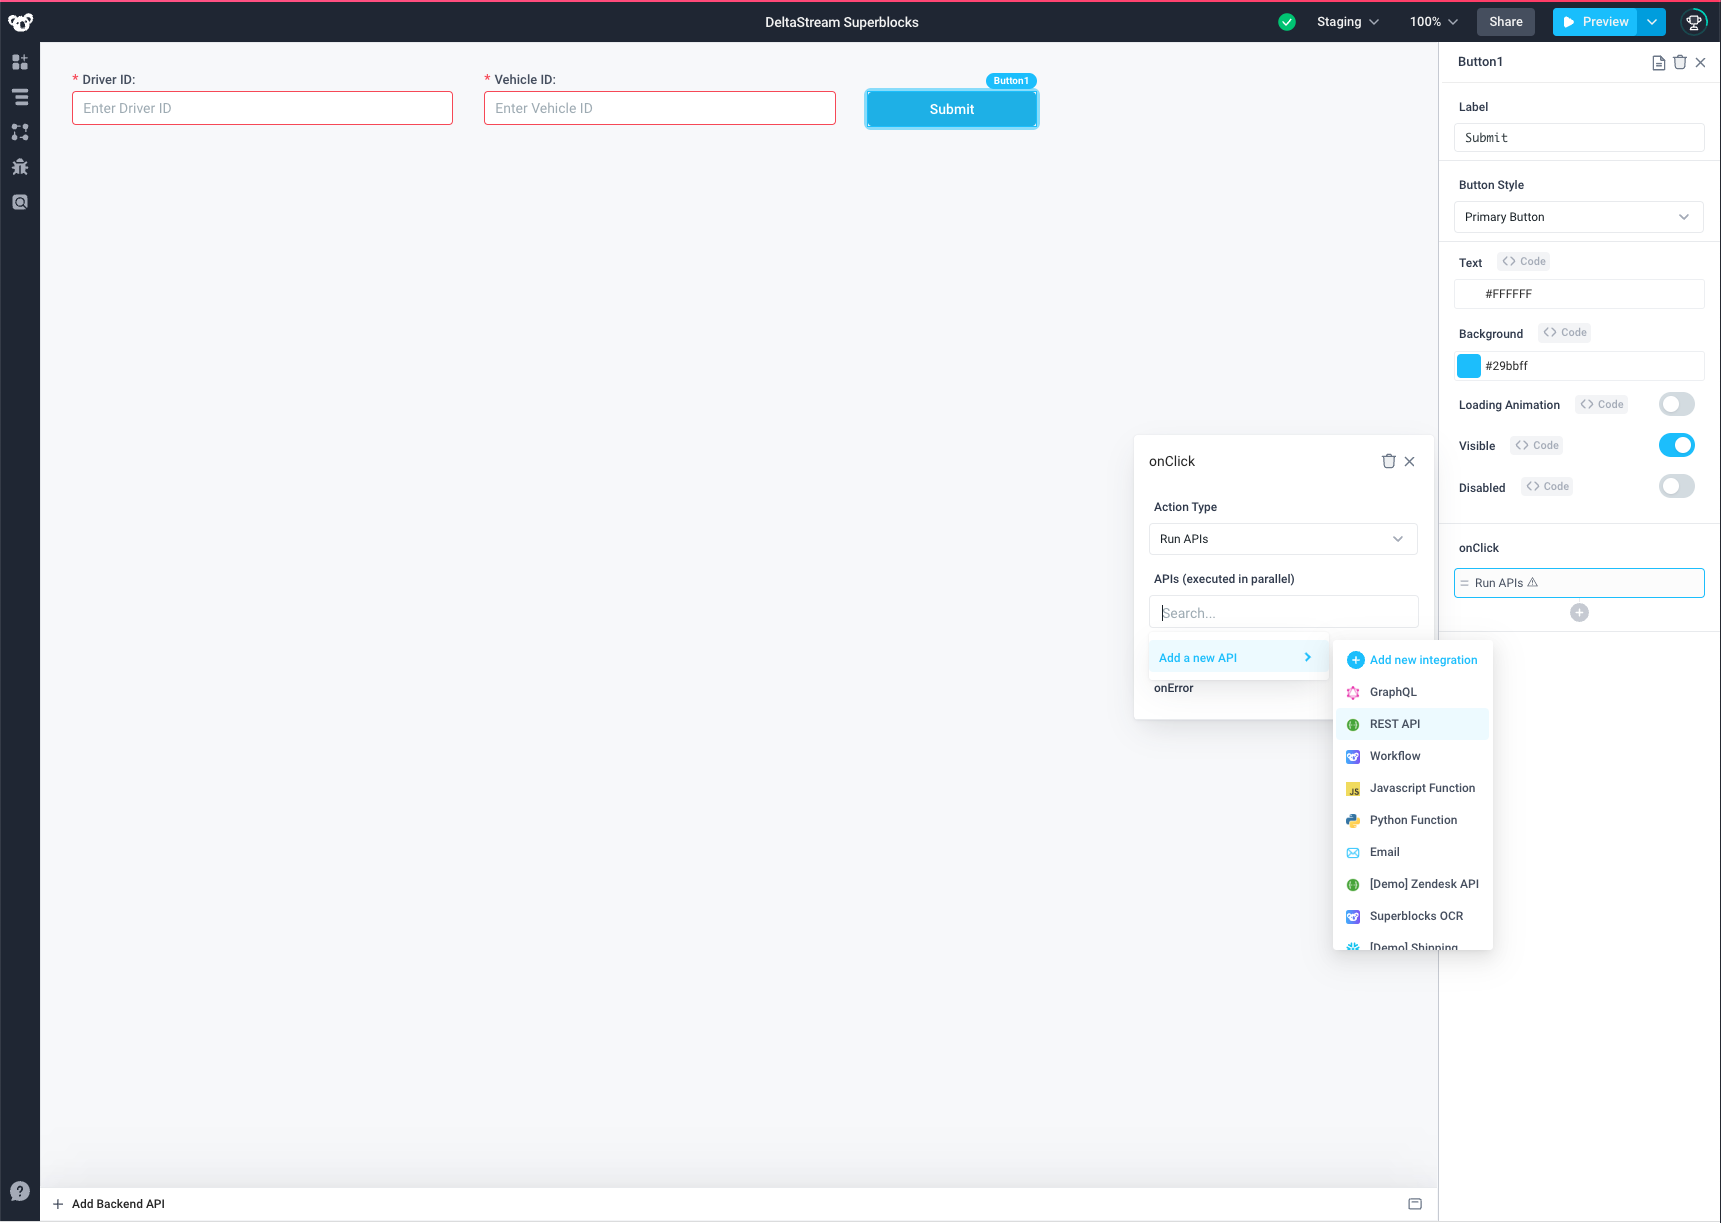
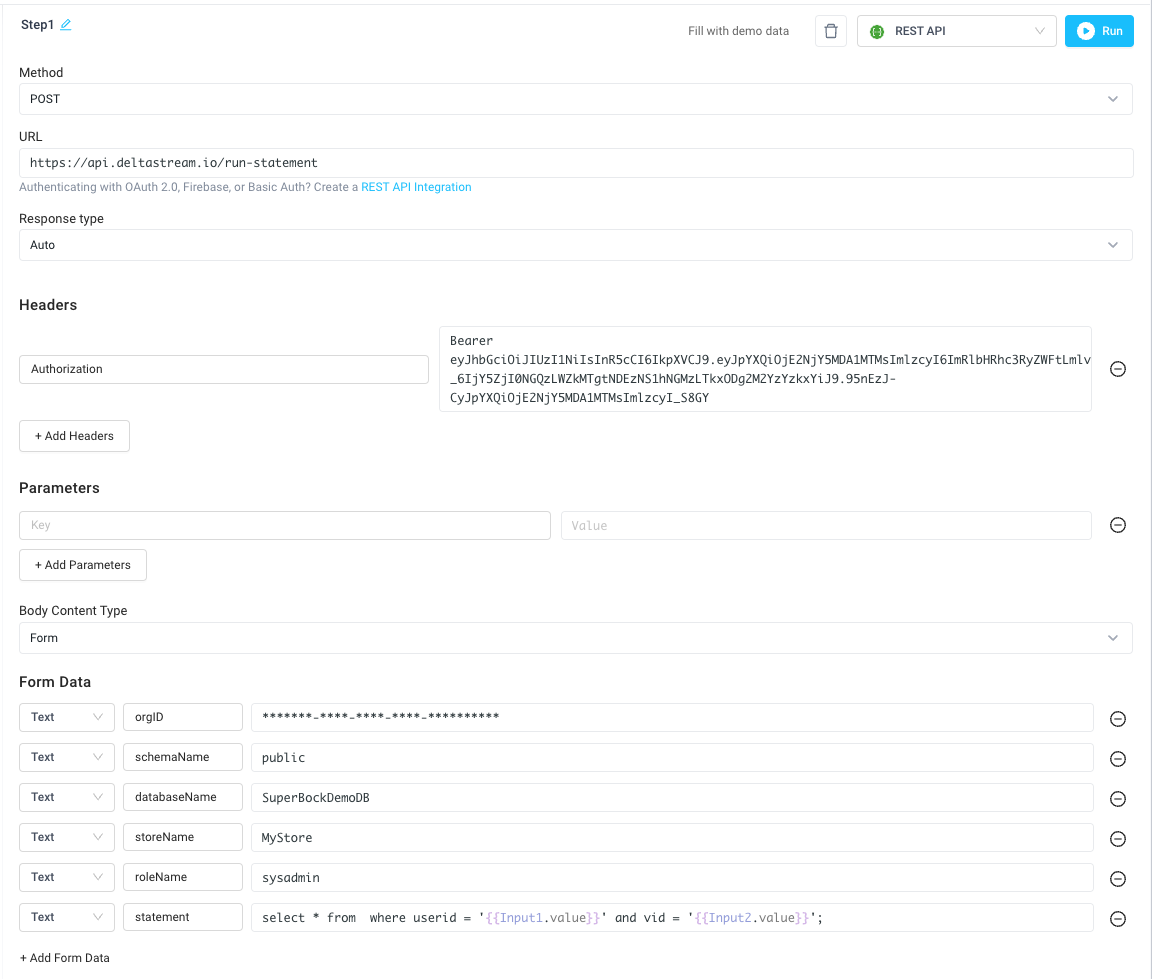
Users can use DeltaStream’s Web App, CLI, or REST API to query the materialized view. Using one of these methods, downstream data consumers, such as the team responsible for driver suspensions in the rideshare company, can query the materialized view for the latest results. For example, we can query the materialized view for driver IDs with a rating below 4 and at least 15 rides.
Query 1 against avg_driver_ratings materialized view:
Let’s also run a query to select all of our rows in our materialized view to see what the full result set looks like.
Query 2 against avg_driver_ratings materialized view:
Wrapping Up
In this post, we showcased how DeltaStream can keep average ratings up to date in real time. While calculating average reviews is typically a job done with batch processing, recreating this use case with stream processing creates opportunities for features and data products to be built on the new real-time assumptions. Although we focused on ridesharing in this example, ratings are used in plenty of different contexts and the same pipeline can be used to keep those ratings up to date in DeltaStream.
DeltaStream is the platform to unify, process, and govern all of your streaming data. If you want to learn more about DeltaStream’s materialized views or other capabilities, come schedule a demo with us or sign up for a free trial.